Advanced project configuration
Note: For this section you need to have some skills on Alfresco Models and Javascript API's
Project module is very powerfull and can be used to achieve advanced goals instead of creating worflows.
Some of the advanced features are:- Role assignment;
- User wizard;
- Javascript deliverable.
Imagine you want to create a new project for implementing a supplier portal.
You want :- Supplier to be assigned to a task and have a wizard to setup raw material properties;
- Custom actions and emails at the end or start of a task.
In this documentation we will follow this example as tutorial.
Creating the supplier project template
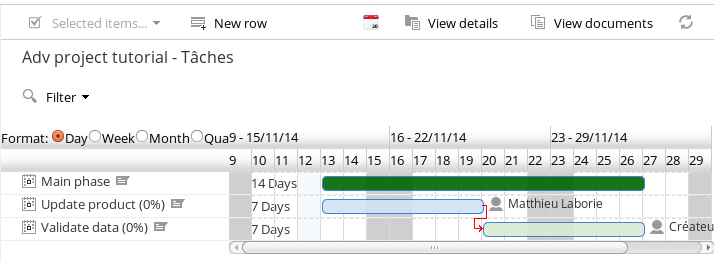
Our sample project will contain two tasks:
- One that will be assigned to a supplier role.
- One assigned to the initiator of the project in order to validate data.
For this purpose, create a new project and add tasks like this:
Once done, you can set your new project as a template to reuse it later.
Creating user roles
Out of the box, project module comes with two roles:
- Project Manager (PROJECT_pjt_projectManager)
- Project Creator (PROJECT_cm_creator)
A role is simply an Alfresco group.
To create a new project role, you should create a group with name starting by PROJECT_ plus the qName of an Alfresco association.
That property will be read on the project node and should be of type person.
Example of the Supplier role:
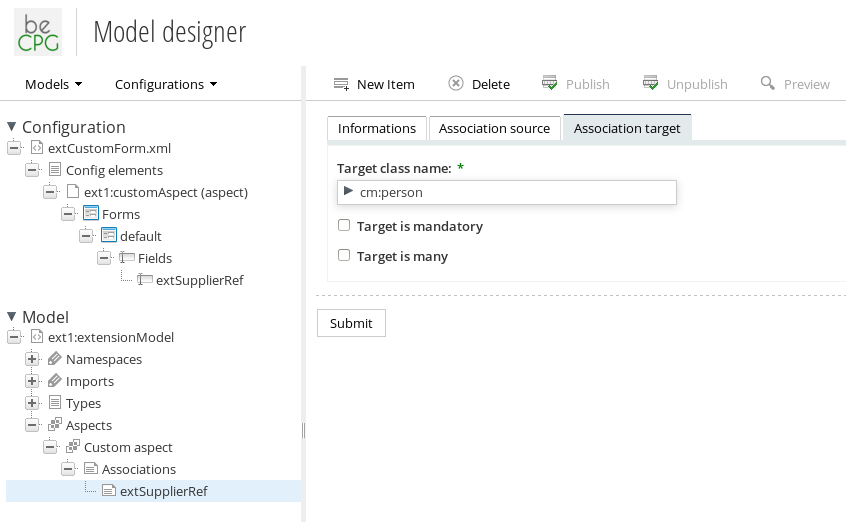
- First create your custom Alfresco aspect with the association to Supplier.
You can use the beCPG model designer.
Go to designer --> Open ext model --> Add a new association to Custom Aspect of type cm:person.
Create the corresponding form and publish your model.
Or you can create it using xml.
First the model:
<aspect name="ext1:customAspect">
    <title>Adv project tutorial aspect</title>
    <associations>
        <association name="ext1:extSupplierRef">
            <title>Supplier role</title>
            <source>
                <mandatory>false</mandatory>
                <many>true</many>
            </source>
            <target>
                <class>cm:person</class>
                <mandatory enforced="false">false</mandatory>
                <many>false</many>
            </target>
        </association>
    </associations>
</aspect>
Then the Share form configuration:
<alfresco-config>
    <config condition="ext1:customAspect" evaluator="aspect" replace="false">
        <forms>
            <form>
                <field-visibility>
                    <show force="false" id="ext1:extSupplierRef" />
                </field-visibility>
                <appearance>
                    <field id="ext1:extSupplierRef" mandatory="false" read-only="false" />
                </appearance>
            </form>
        </forms>
    </config>
</alfresco-config>
- Second add your aspect to the project template.
You can use the javascript console:
var node = search.findNode("workspace://SpacesStore/1c99529c-3719-4381-bf29-4175ec3ee255");
node.addAspect("ext1:customAspect");
You should then have your new field, where you can add a supplier to your project.

- At least create a new Alfresco group named PROJECT_ext1_extSupplierRef and add it like a resource to your task.

That's it you have created a new project role.

Your users can now start a new project, choose the Supplier template and affect a person to the Supplier role.
Creating a task wizard
Wizard is a new feature of beCPG, it's addressed by URL and it is automatically detected by project adhoc task.
A wizard is a set of steps that point to an Afresco form or a beCPG datalist. A wizard is defined under an Alfresco share config file.
For example share-config-custom.xml. Designer for now doesn't allow to set-up wizard.
Wizard can be defined as this:
   <config evaluator="string-compare" condition="wizard">
       <wizards>
            <wizard id="wizard-id">
                <step id="step1" label="Choose raw material" type="form" formId="supplier-article"
                    itemId="pjt:project" nextStepWebScript="becpg/project/entity?nodeRef={nodeRef}"></step>
                <step id="step2" label="Product information" type="form"
                    formId="" itemId="bcpg:finishedProduct"></step>
                <step id="step3" label="Packaging list" type="entityDataList" listId="packagingList"
                    itemId="bcpg:packagingList" title="Sample title"></step>
            </wizard>
        </wizards>
     </config>
id id of the wizard or the step;
label or label-id (i18n) the label of the step;
type the step type form or entityDataList for now;
listId for type entityDataList the name of the datalist to show;
formId for type form the id of the alfresco form to show;
itemId the Alfresco qName type of the node to show;
title or title-id a title message that will be displayed on top of the step;
nextStepWebScript a webscript that returns a nodeRef called during step transition to change of master nodeRef.
Once created and deployed, the wizard is accessible through the URL.
For edition:
/share/page/wizard?id=wizard-id&nodeRef={nodeRef}
Or for creation of a new node:
/share/page/wizard?id=wizard-id&destination={nodeRef}
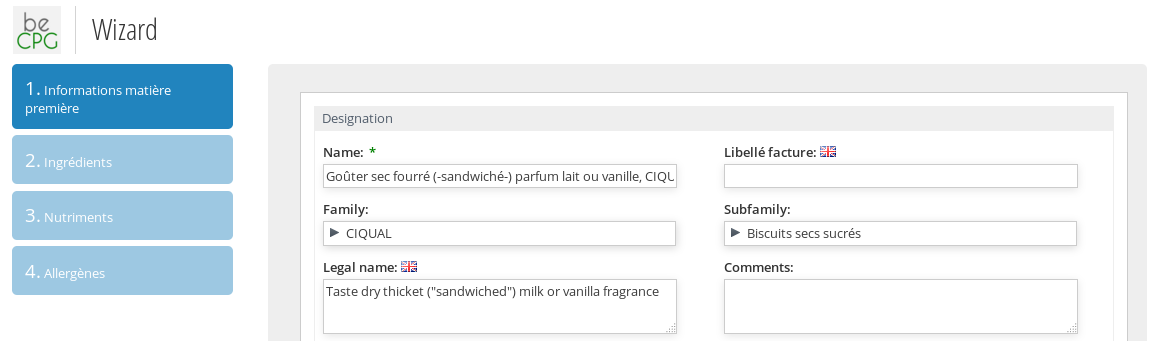
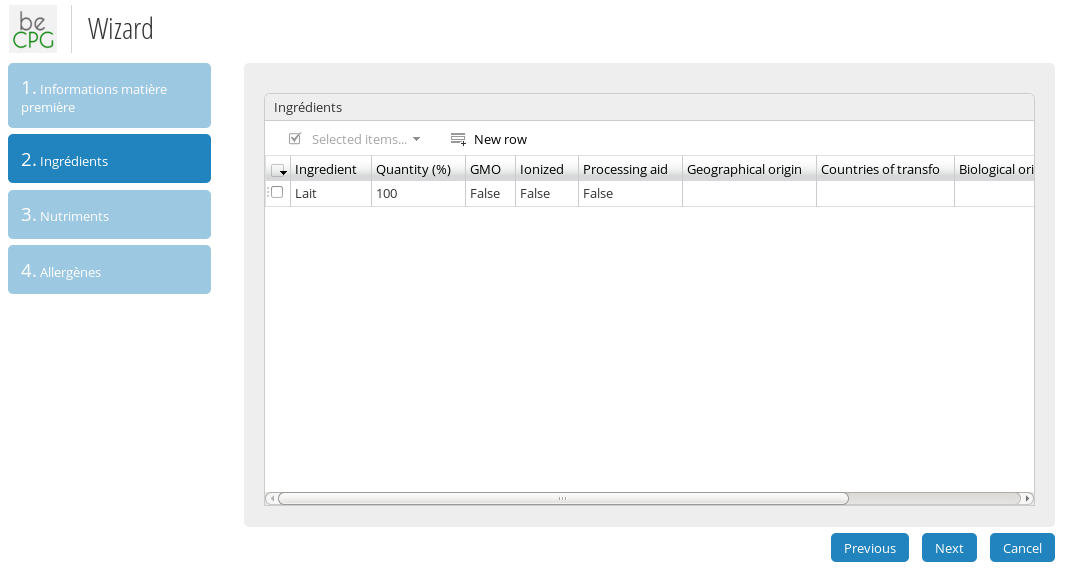
In our exemple, we will create a simple three steps wizard.Note: wizard is part of core module but raw material, allergen, ingredients type is part of PLM modules. You can use your own types and datalists and doesn't need to install PLM modules if you don't need it.
- First step supplier fill the raw material properties;
- Second step the supplier fill the ingredient list;
- Third step the supplier fill the allergens.
Wizard should look like this :
   <config evaluator="string-compare" condition="wizard">
        <wizards>
            <wizard id="supplier-mp">
                <step id="step1" label="Raw material information" type="form" formId="supplier-mp"
                    itemId="bcpg:rawMaterial" ></step>
                <step id="step2" label="Ingredients" type="entityDataList"
                    listId="ingList" itemId="bcpg:ingList"></step>
                <step id="step4" label="Allergen" type="entityDataList"
                    listId="allergenList" itemId="bcpg:allergenList"></step>
            </wizard>
        </wizards>
    </config>
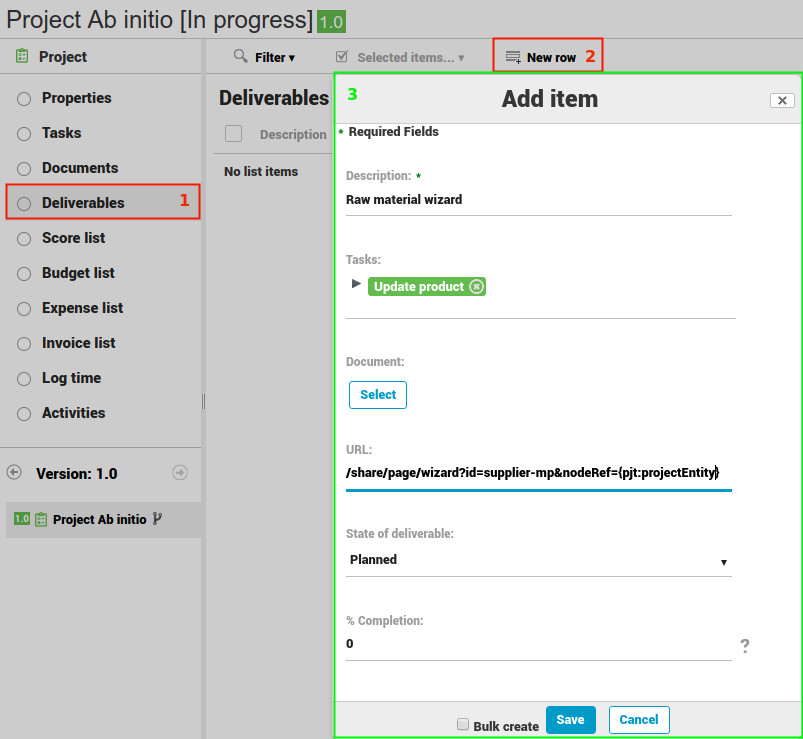
Now we can add a deliverable to the project and attach it to the task.
Use this url :
/share/page/wizard?id=supplier-mp&nodeRef={pjt:projectEntity}
The pattern {pjt:projectEntity} means that project will look at the association pjt:projectEntity of the project to find the nodeRef to display the wizard. You can use any {qName} pattern or {nodeRef} for the current project node.
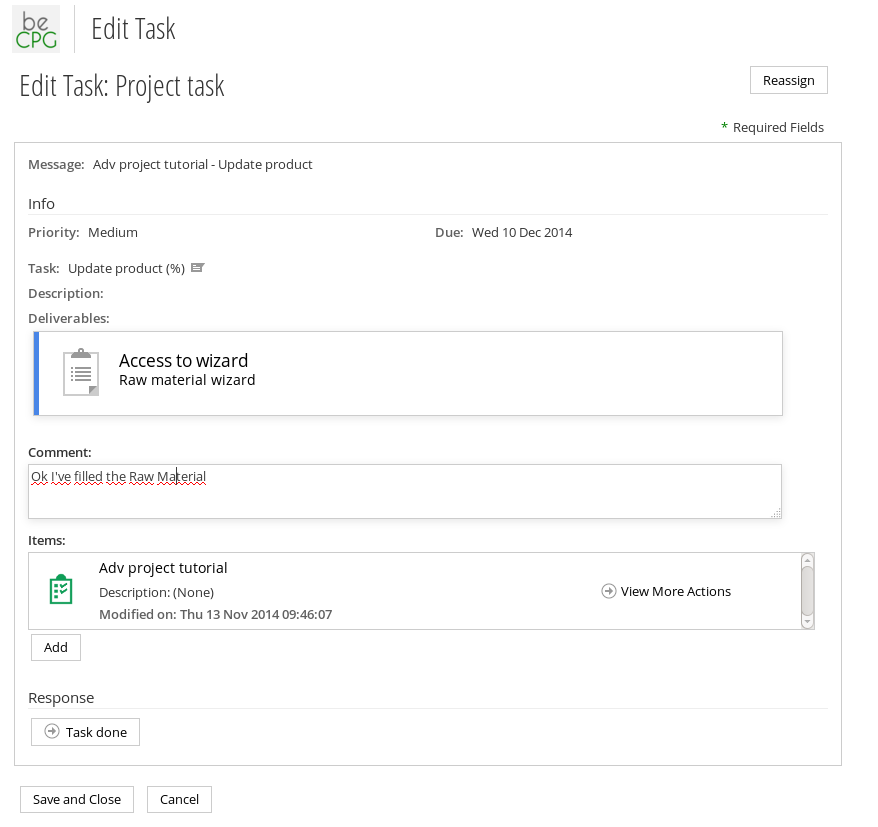
Now you can start the project, choose the Supplier project Template, choose a user as Supplier role and choose a raw material under Project entity.
If you have assigned the adhoc workflow to the task, supplier will receive a new assignment with a link to the wizard:
Creating task scripts
Task scripts are very powerfull way to execute arbitrary code during the project flow.
Task scripts are defined with Alfresco repository scripts plus some custom variables:
- project a reference to the project. Caution this is not an Alfresco node but a beCPG ProjectData.java wrapper. To get the project Alfresco node use this:
var projectNode = search.findNode(project.nodeRef);
- shareUrl url to share
Note: All the variables present in ProjectData should be set by the project data accessor, do not try to use Alfresco Api for this or you will get unpredictible results.
Example :
    project.state = "InProgress";
    project.hierarchy1 = "workspace://SpacesStore/678c2a75-1c2c-4b00-91e7-594788c004d3";
    project.hierarchy2 = "workspace://SpacesStore/4d2a7e69-4b02-4458-a61f-dcd87416ea7c";
Have a look at the Alfresco documentation to see all the API: http://docs.alfresco.com/4.2/concepts/API-JS-intro.html
In our example we will use this functionality to send a custom mail to supplier once the raw material has been review.
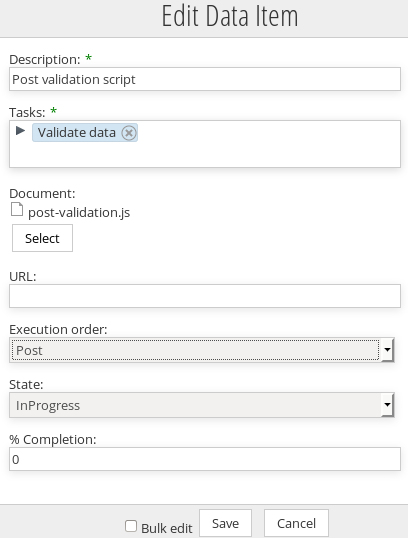
Create a file post-validation.js with the following content under Alfresco:
function main()
{
    var supplier = null, rawMaterial = null;

    var projectNode = search.findNode(project.nodeRef);

    if (projectNode.assocs["ext1:extSupplierRef"] != null && projectNode.assocs["ext1:extSupplierRef"].length > 0)
    {
        supplier = projectNode.assocs["ext1:extSupplierRef"][0];
    }

    if (projectNode.assocs["pjt:projectEntity"] != null && projectNode.assocs["pjt:projectEntity"].length > 0)
    {
        rawMaterial = projectNode.assocs["pjt:projectEntity"][0];
    }

    if (supplier != null && rawMaterial!=null)
    {
                try
                {
                    var mail = actions.create("mail");
                    mail.parameters.html = "html";
                    mail.parameters.to = supplier.properties["cm:email"];
                    mail.parameters.subject = "[" + projectNode.name + "] Raw material validated";
                    mail.parameters.from = "support@becpg.fr";
                    mail.parameters.ignore_send_failure = true;
                    mail.parameters.text = "<html>Hi, <br/><br/>" + "Raw material is validated. Thanks"
                    +"<a href=" + shareUrl + "/page/entity-details?nodeRef=" + rawMaterial.nodeRef + ">" + rawMaterial.name + "</a></html>";
                    mail.execute(projectNode);
                }
                catch (e)
                {
                    logger.error("Cannot send mail :");
                    logger.error(" - subject: " + subject);
                    logger.error(" - e: " + e);
                }
    }
}

main();
In your project, add a new deliverable to the project. Choose the js file in document and set the option Execution order to Post.
The script will be launched once the task is done. Use Pre to launch it before.
Conclusion
As you can see, project module allows to make advanced process flow without any workflow. The main advantage of this approach is that you can manage planning of your process and change it at run time. Project is also easier to set up as it can be deployed without restarting the server.
You also have the choice to create validate and refuse tasks. By choosing to refuse task under task settings, adhoc task will show a refuse button.
You'll need to use workflow when the process isn't changing in time and you need advanced flow return and fork.