Supplier Portal
- Contenu
- Supplier Portal
1. Tutorial for User – How to create a Supplier
1.1 How to create and configure a supplier’s profile.
How to create a supplier
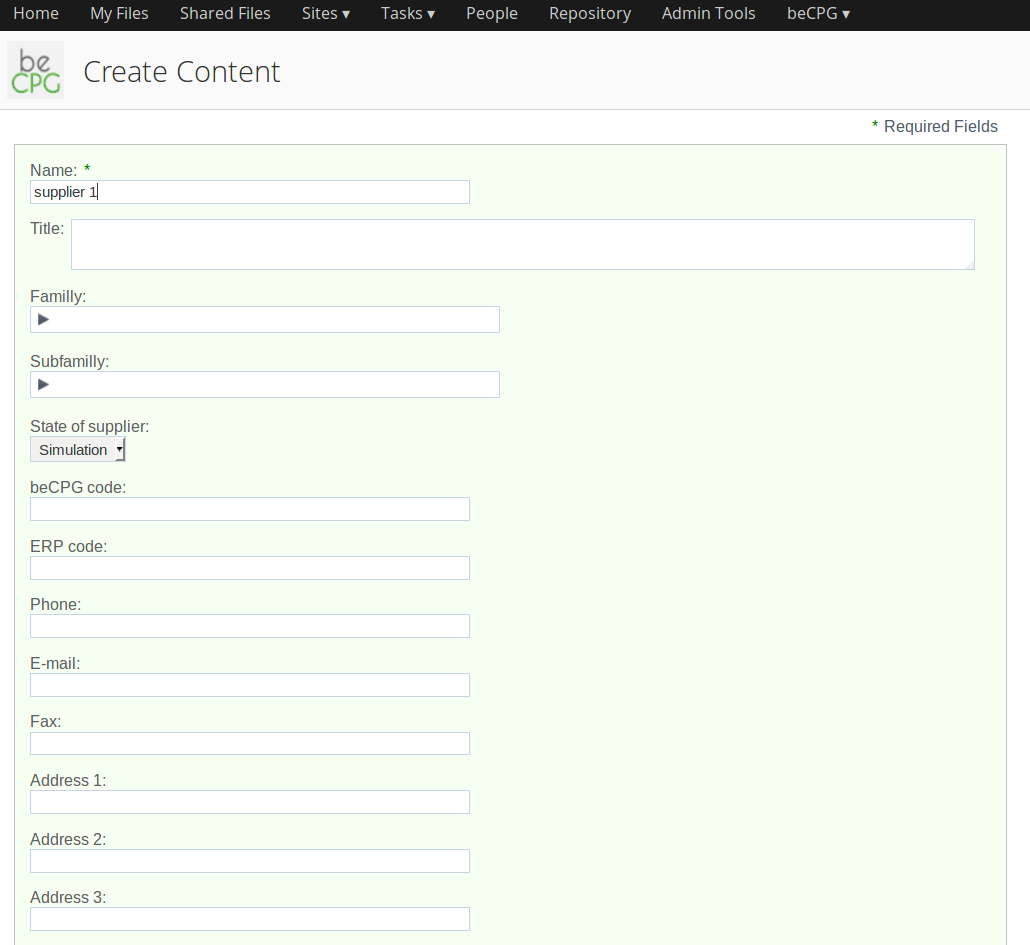
- Open the location in the collaboration site where you want to create the Supplier / the entity Supplier,
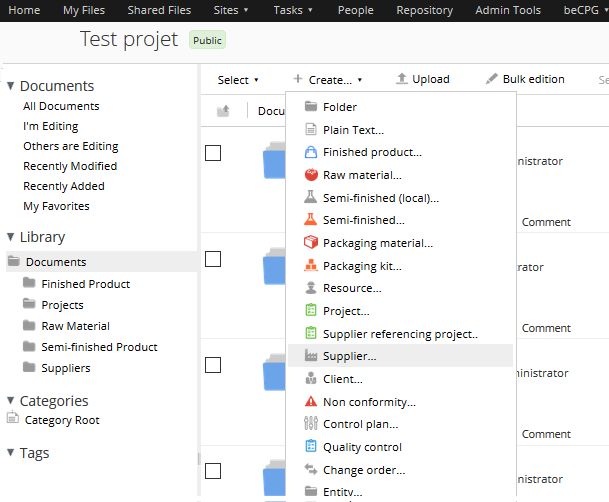
- In the product library, click on « + Create > Supplier »,
- Complete the information requested.
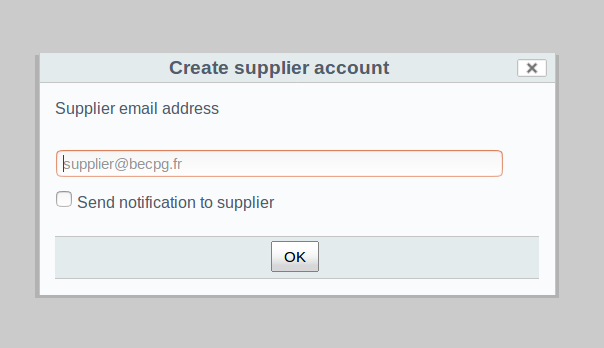
Associate a supplier with a user account.
- From the previously created supplier,
- Click on "Action" > Create supplier account
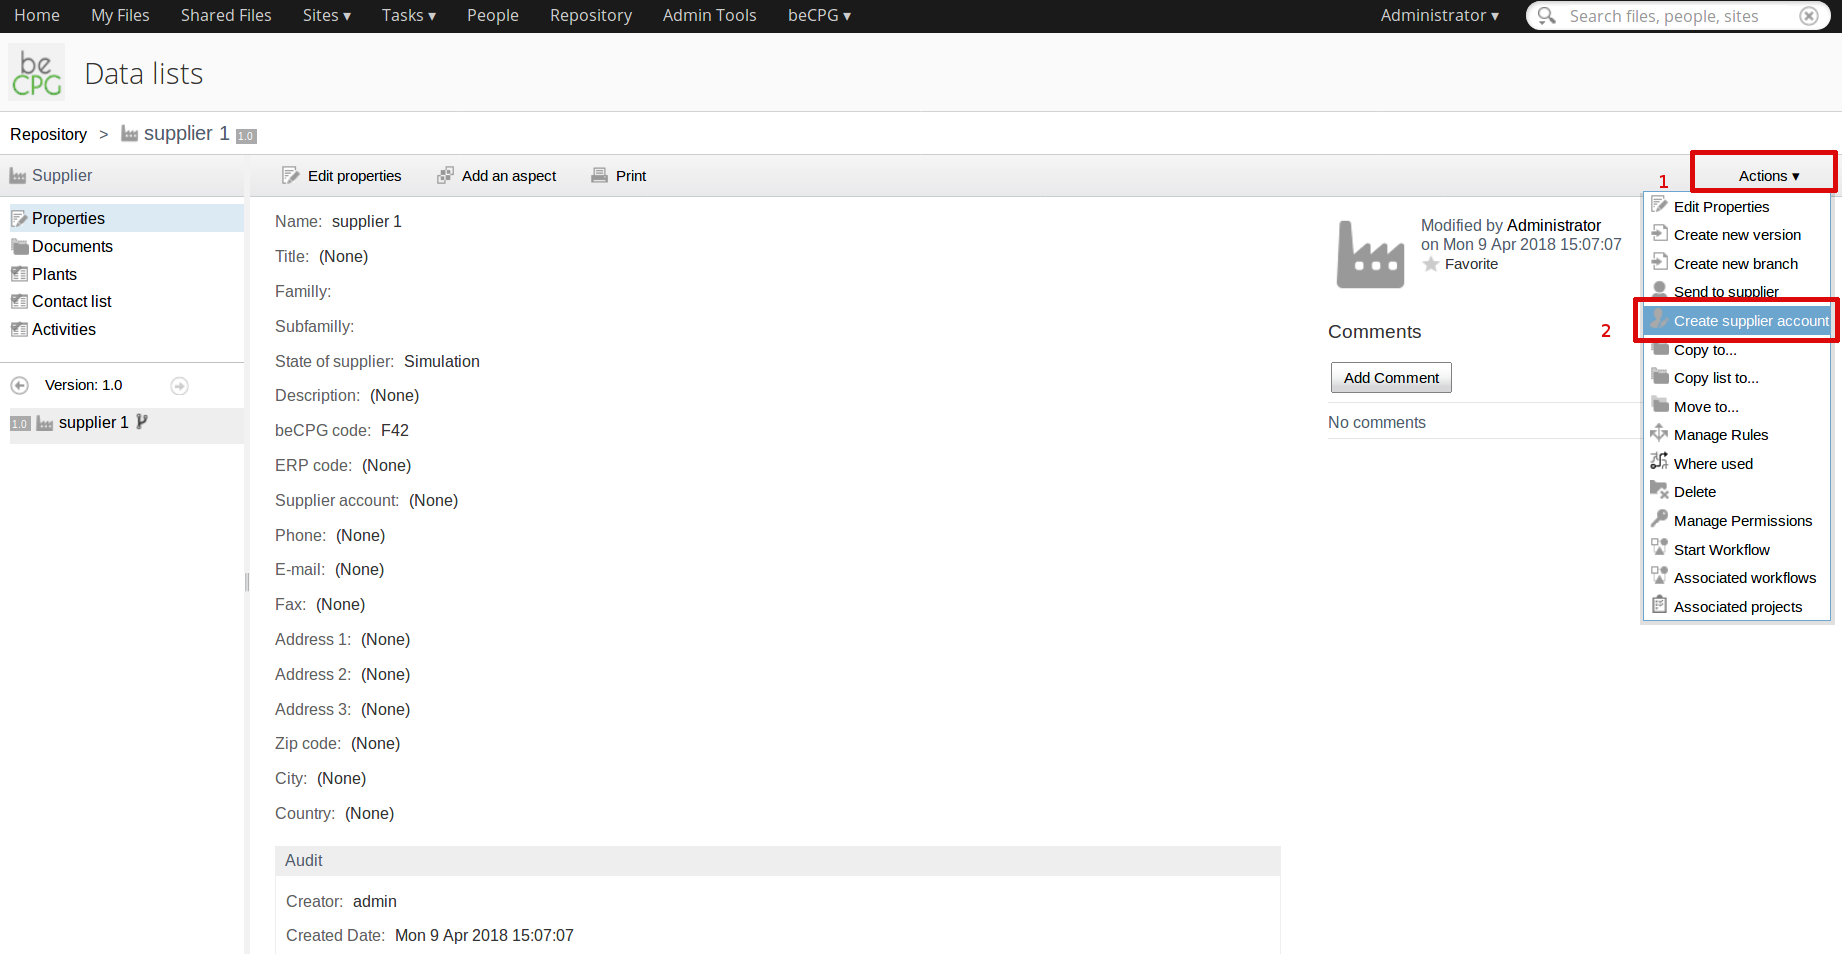
- In the form fill the supplier's email address, also you can check notify supplier if you want send authentication information to supplier otherwise theses informations will be sent only to the current user who created this supplier.
- When you click on OK button, the system will create an external user and will associate it to the current supplier.
1.2 Create a raw material and send it to supplier
Create a raw material and associate it to a supplier.
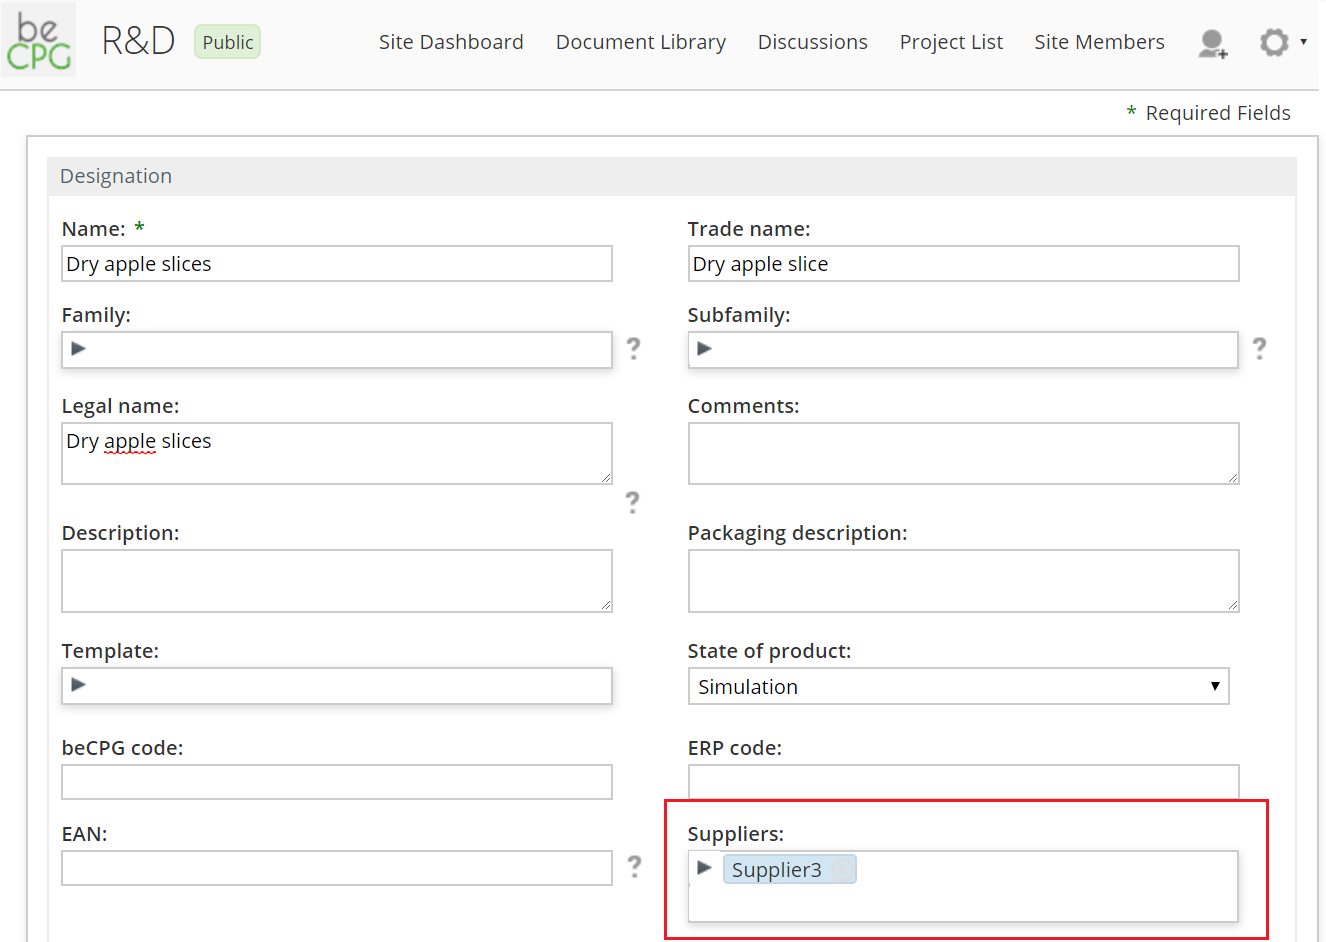
- Open the location in the collaboration site where you want to create the raw material;
- In the product library, click on « + Create > Raw Material »;
- Complete the information requested and associate the corresponding supplier.
Send a raw material to supplier
Using the new functionality Send to supplier you can send an entity (supplier, raw material, packaging) to supplier
- From the created raw material,
- Click on the menu Action, after that click on the item Send to supplier
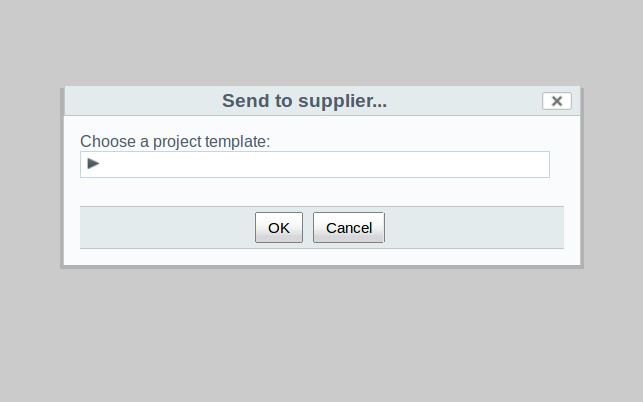
- In the new form Choose a project template and click OK
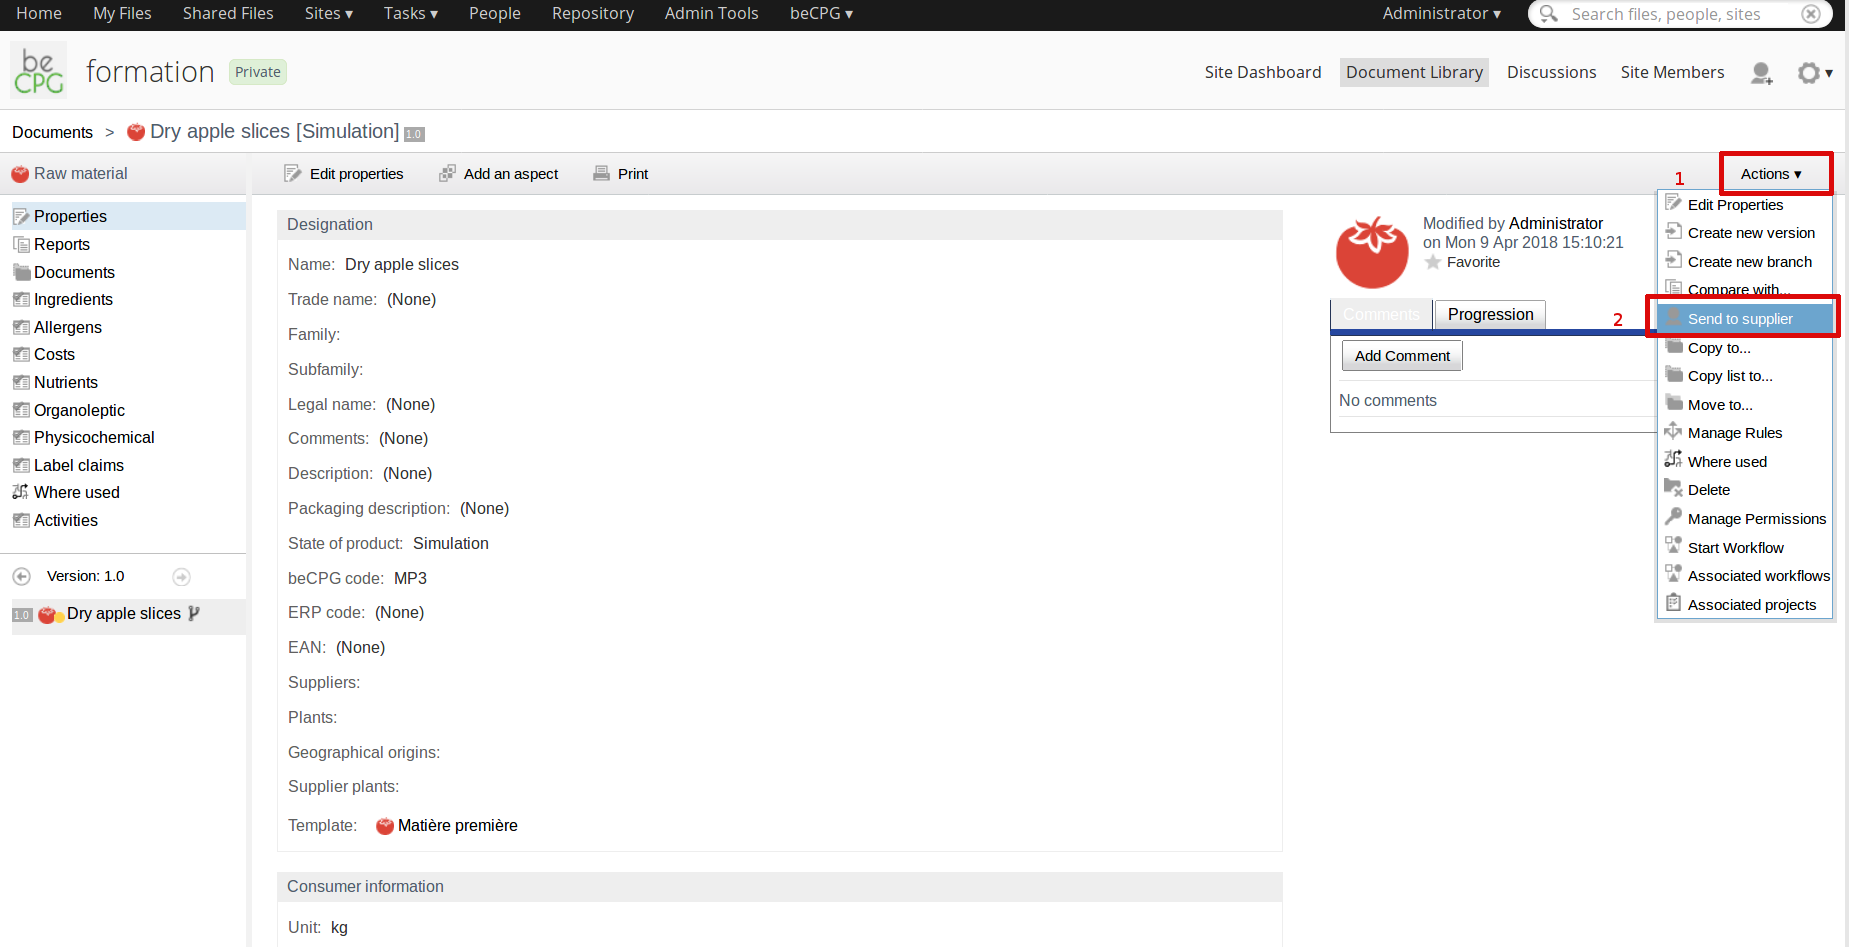
When you click on the OK button, a new task will be assigned to the associated supplier, which will be displayed in his Dash board, where the supplier can fill the informations related to raw material and submit it back.
1.3- Validate a project
Monitoring an ongoing project
It is possible to check the progress of the projects. There are several possibilities:
- Click on “project list” (dashlet of the user’s Dashboard),
- Click on « project List » (dashlet of Site’s Dashboard or tab on the top right-hand corner),
- Click on the project.
Receiving a new task
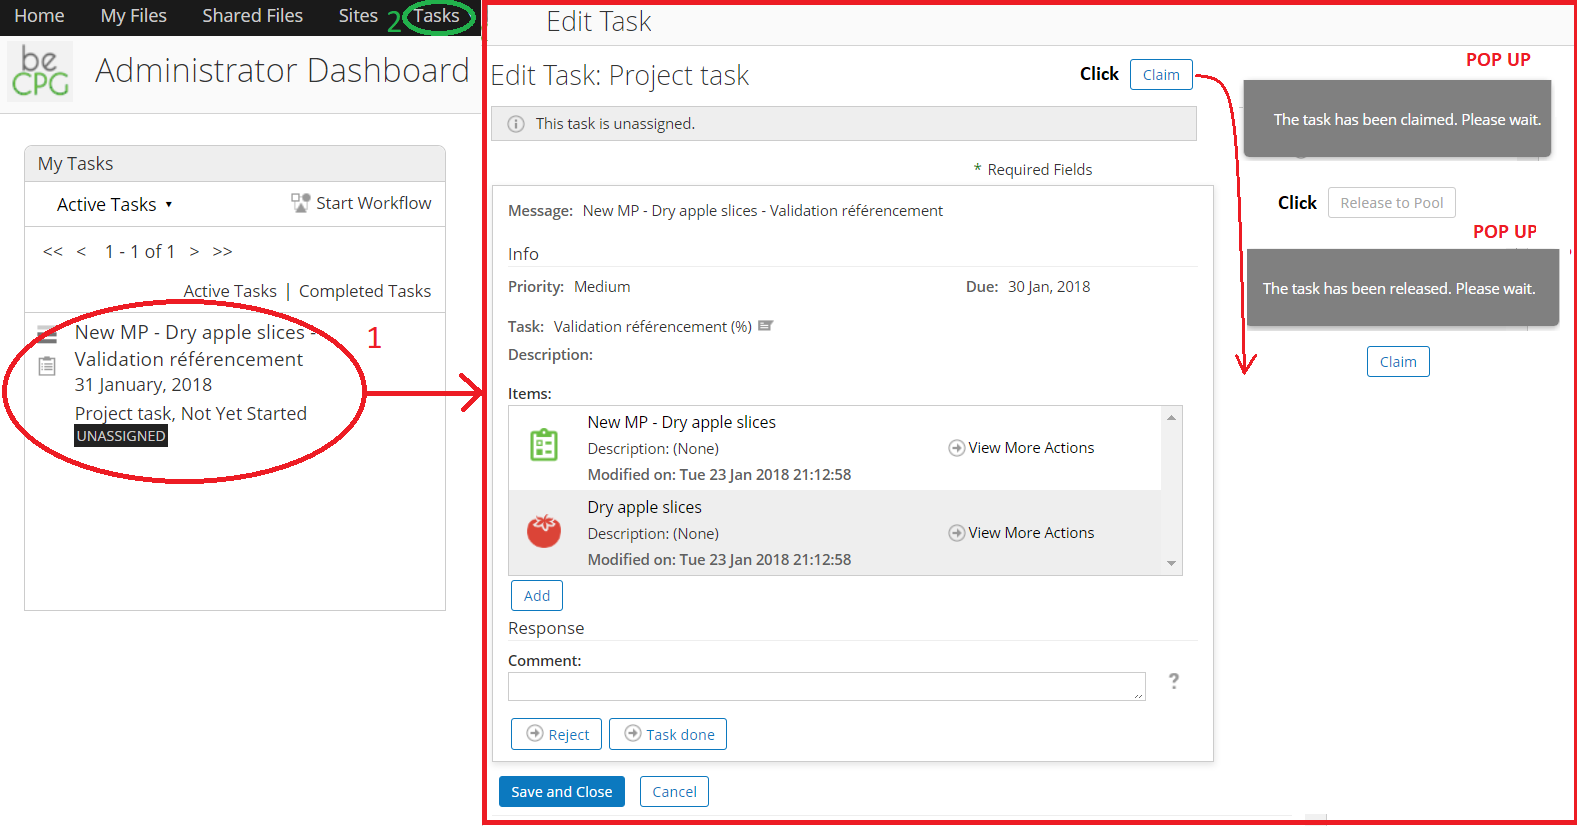
When all the raw material ‘s properties and information are completed, the supplier valid the task. A new one will appear in your list of tasks.
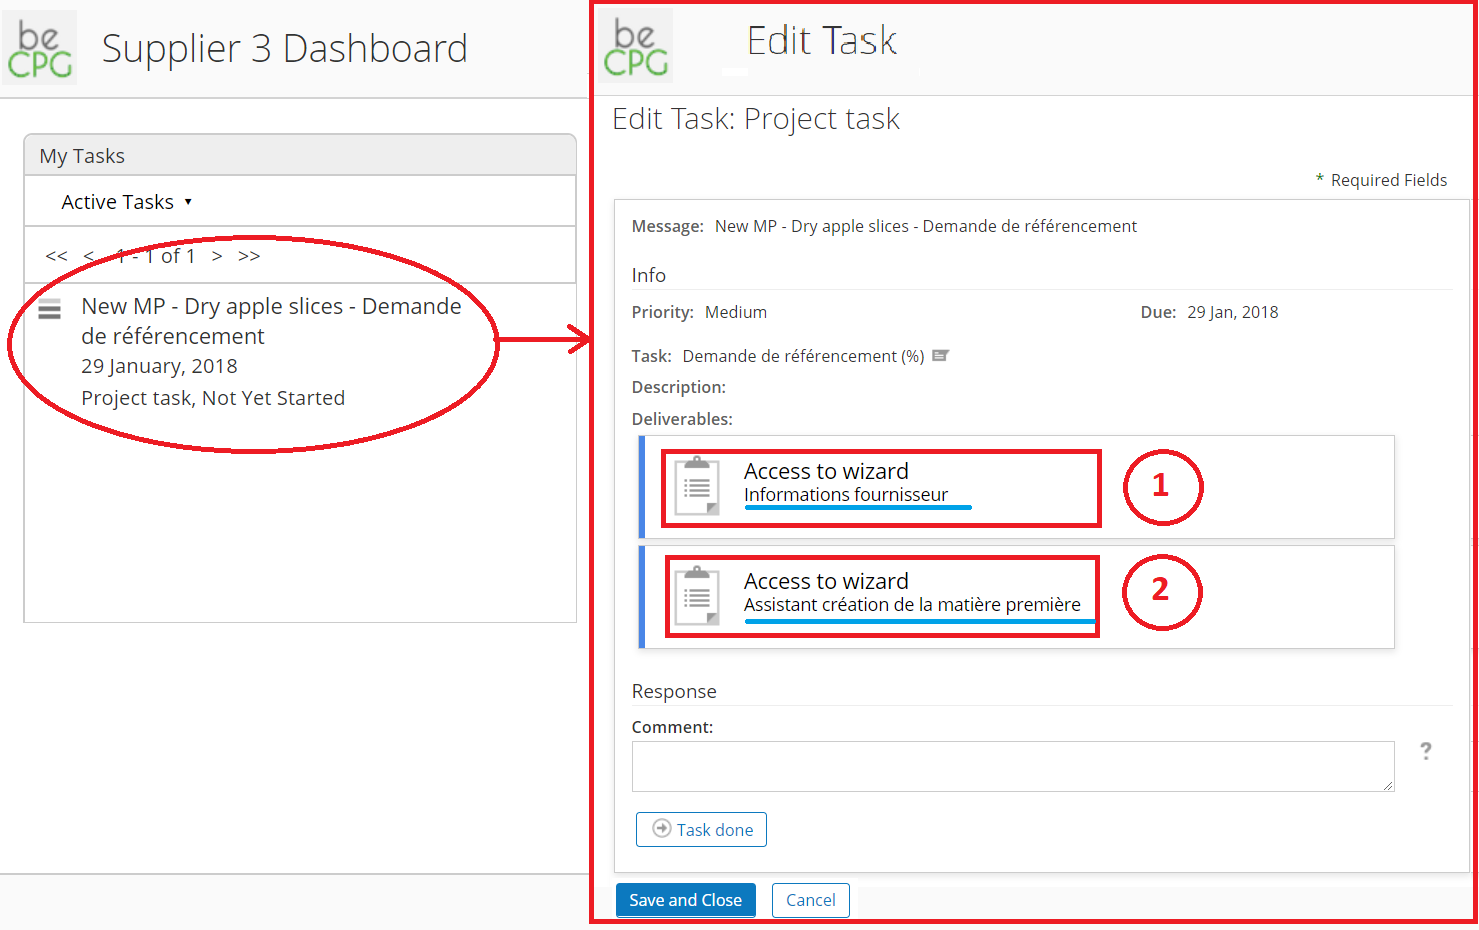
It is possible to consult all your tasks on your dashboard (1) or in “Tasks > My task” (2). See the picture
If several users can valid the raw material, you need to claim the task (see below how to Claim and Release to pool a task).
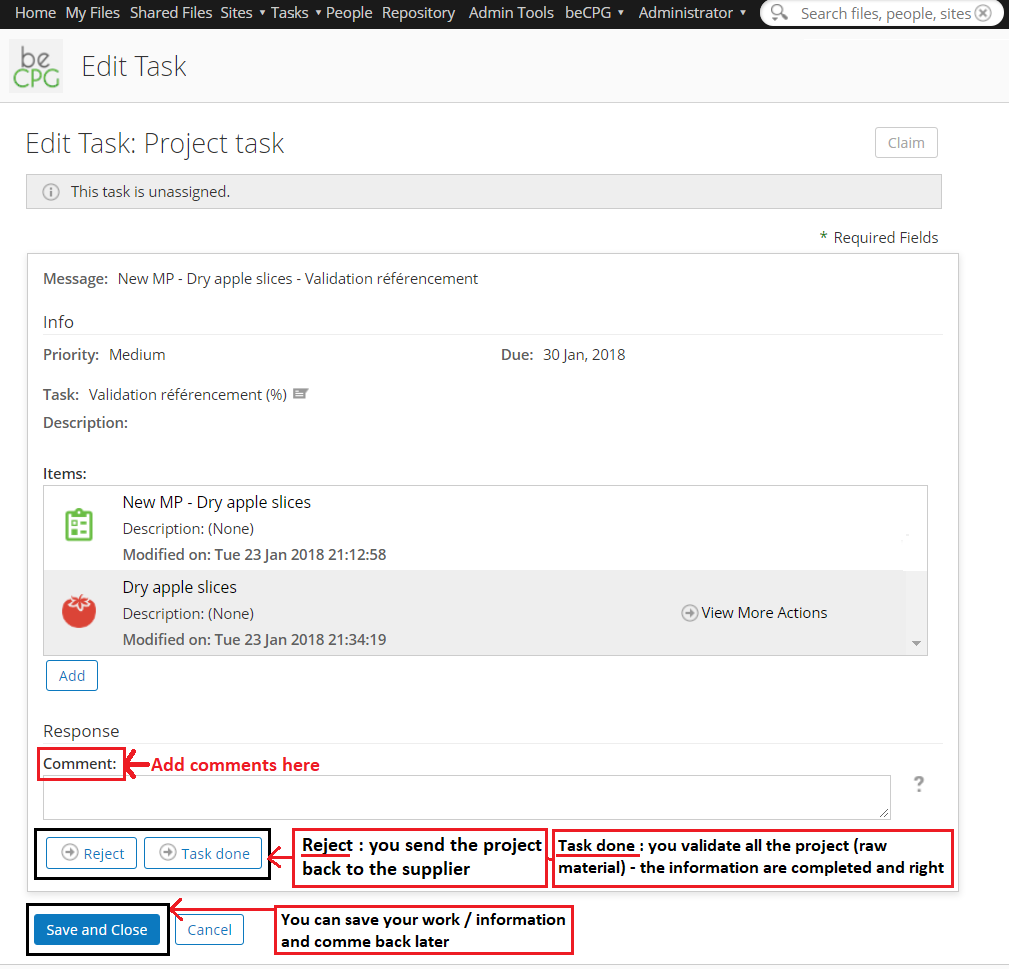
Now, it is possible to validate it if everything suits you or to add comments where the information provided are not correctly completed and where the supplier must do changes. You can send the project back to the supplier for modifications.
Les tabs without errors need to be validated by clicking on the following icon (see picture below).
Note: the users who will be responsible for the validation of the raw material must belong to the group beCPG referencement manager.. If not, you will be able to see the project but you won’t be able to see the related raw material.
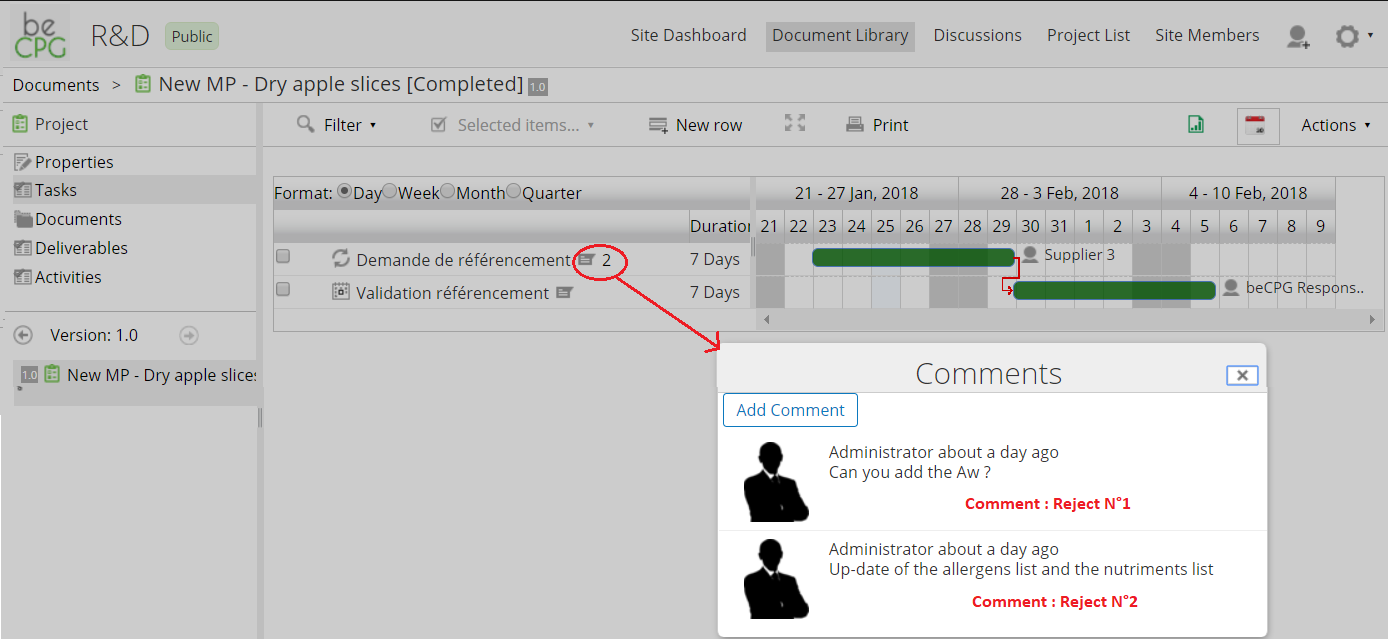
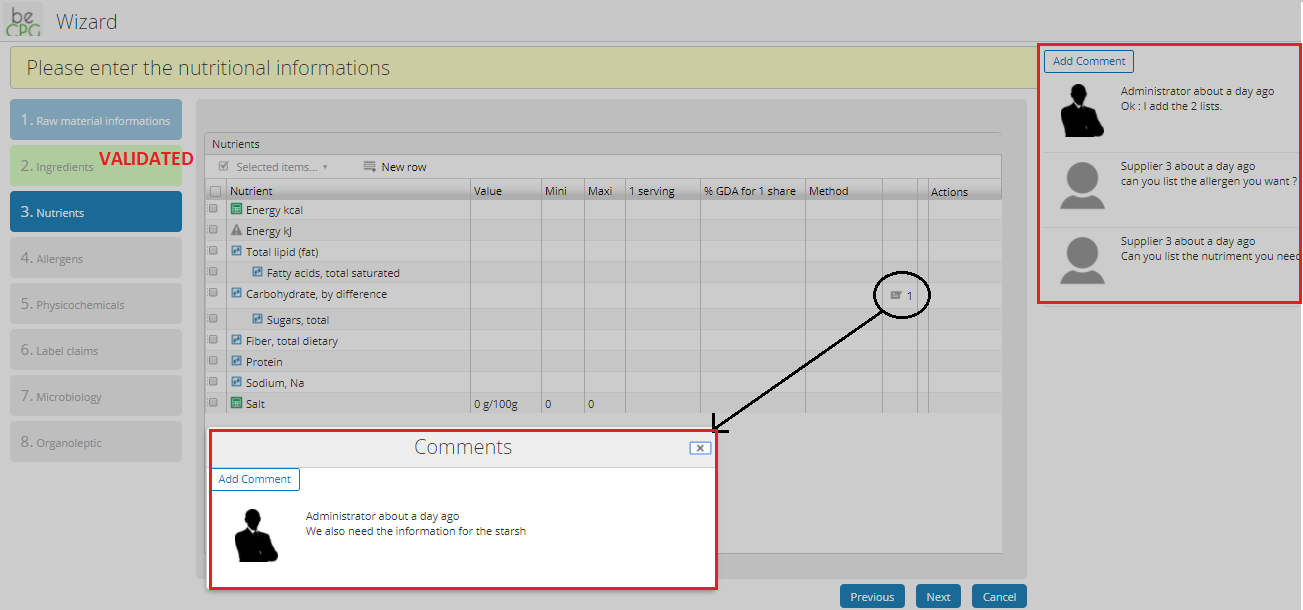
Add comments : Raw Material
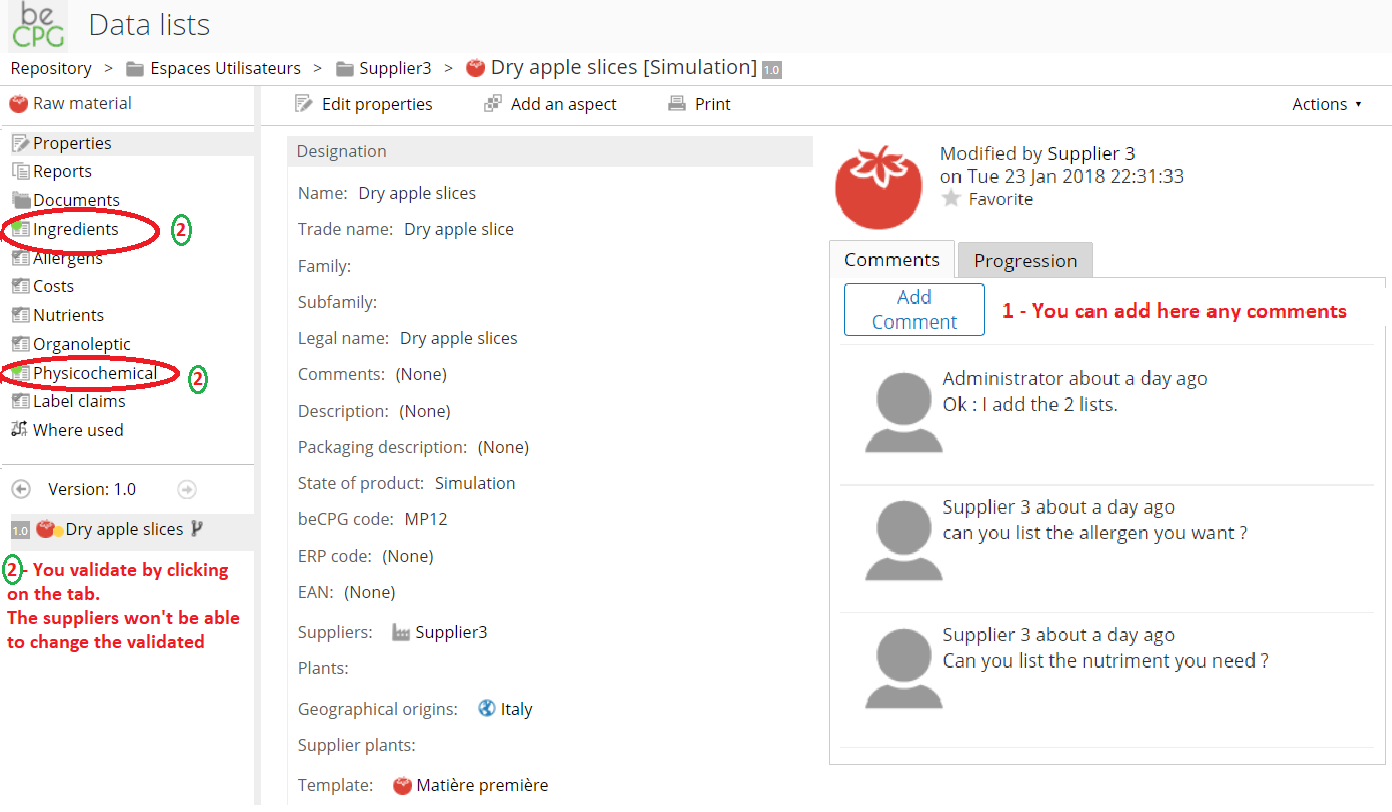
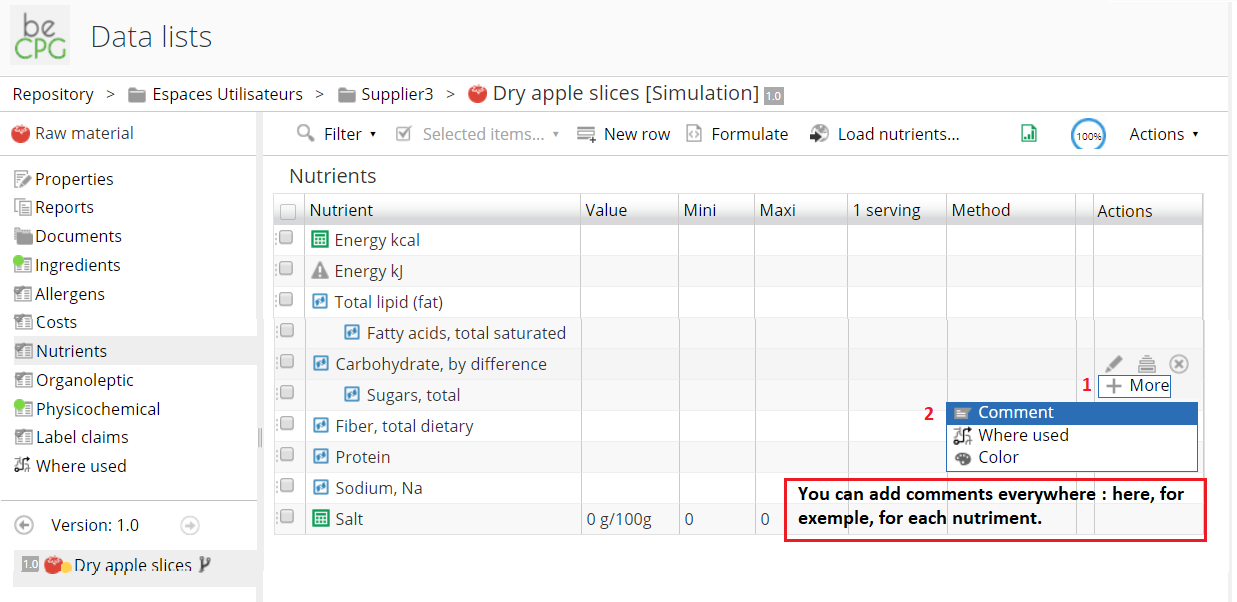
Add comments : Tasks
You can see the complete list of the tasks'comments
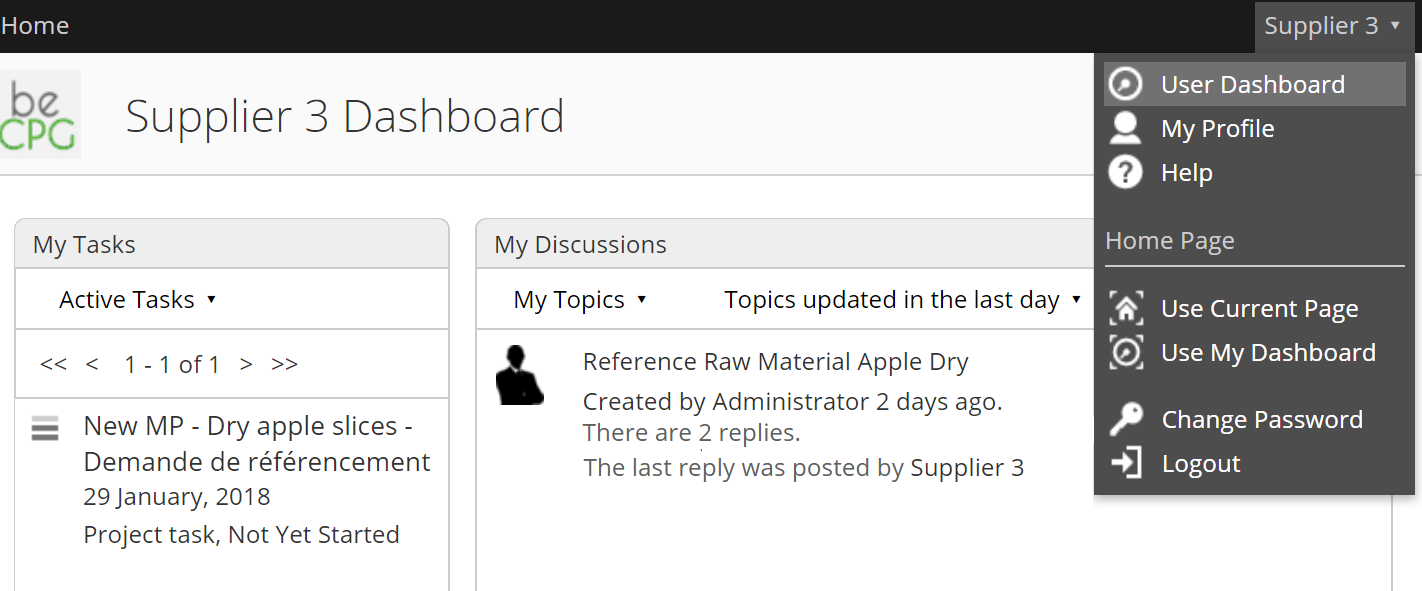
1.4 Discussion
The interface of the dashlet “Discussion” allows the users to chat. It is possible to add one supplier per discussion.
This interface is specific to a site.
You can use :
- the interface of the dashlet “Discussion” of the collaborative site
- the chatting’s window on the site user’s dashboard.
How to create a Discussion :
In the site :
In the banner at the top of the window, you can add the page "Discussion".
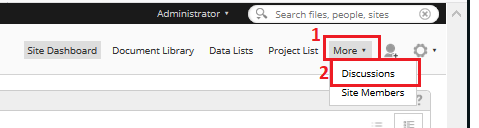
When you click on this tab, a specific window pop up.
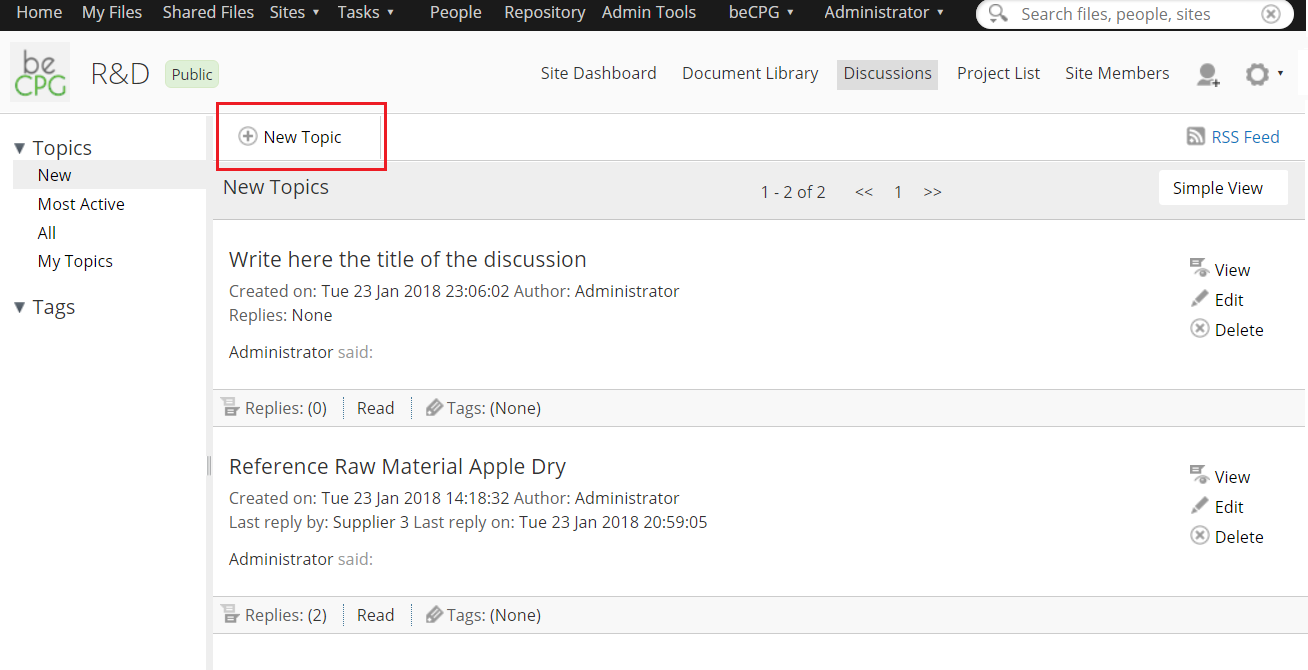
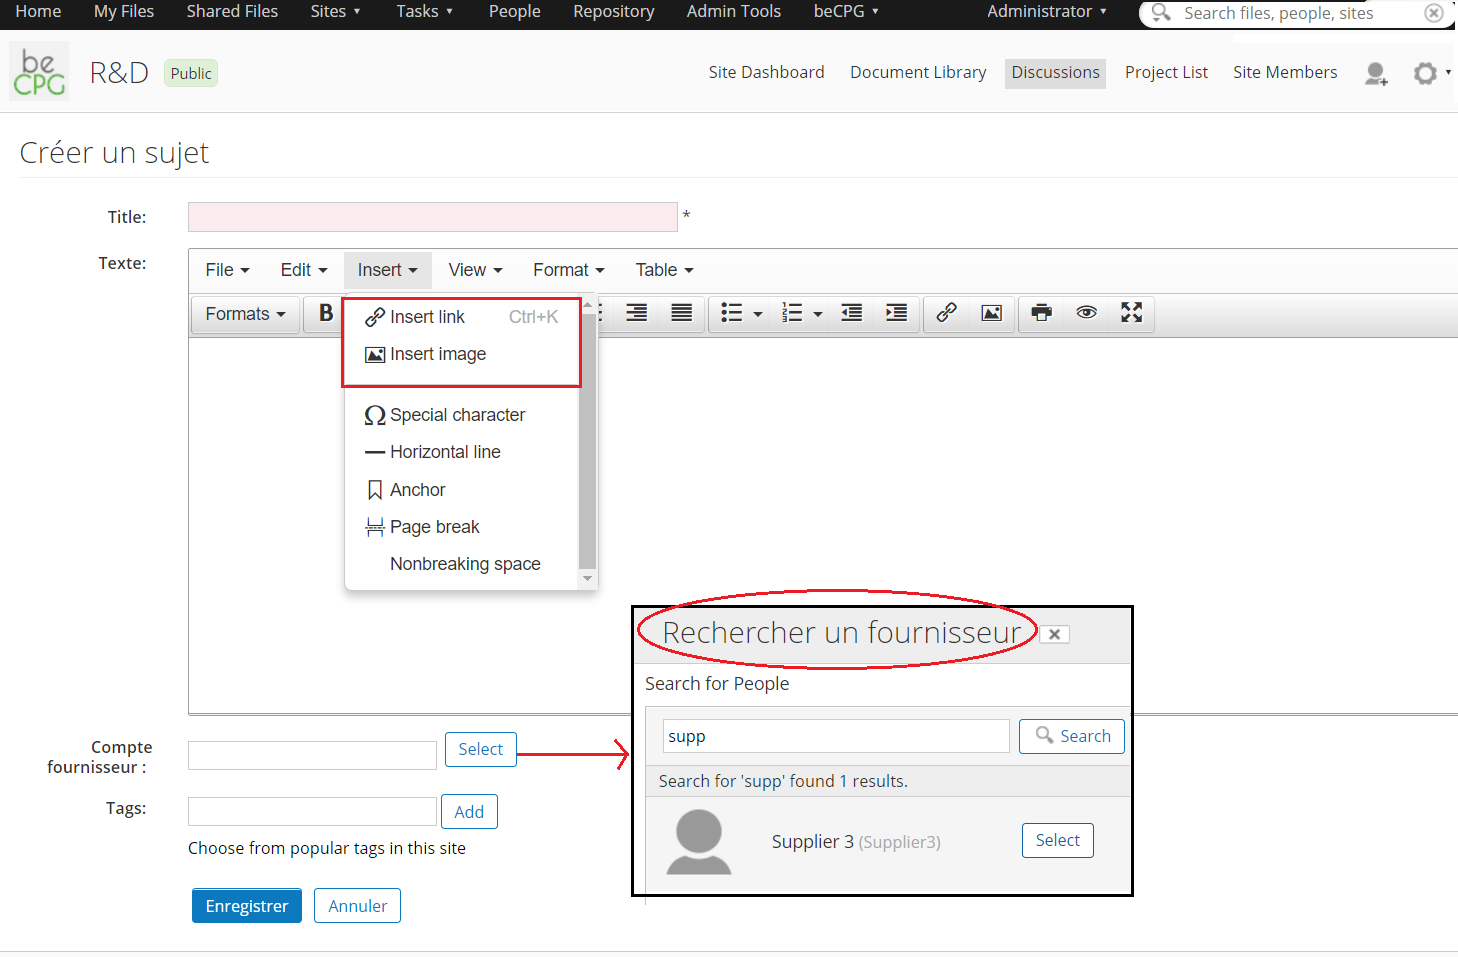
- Click on the tab « Discussion »,
- Click on « New Topic »,
- Complete the information, add links or pictures if you want,
- Add a supplier (select) : only one supplier by Discussion,
- Save.
- The discussions are available at any time :
- The discussions in a site can be read by any intern member.
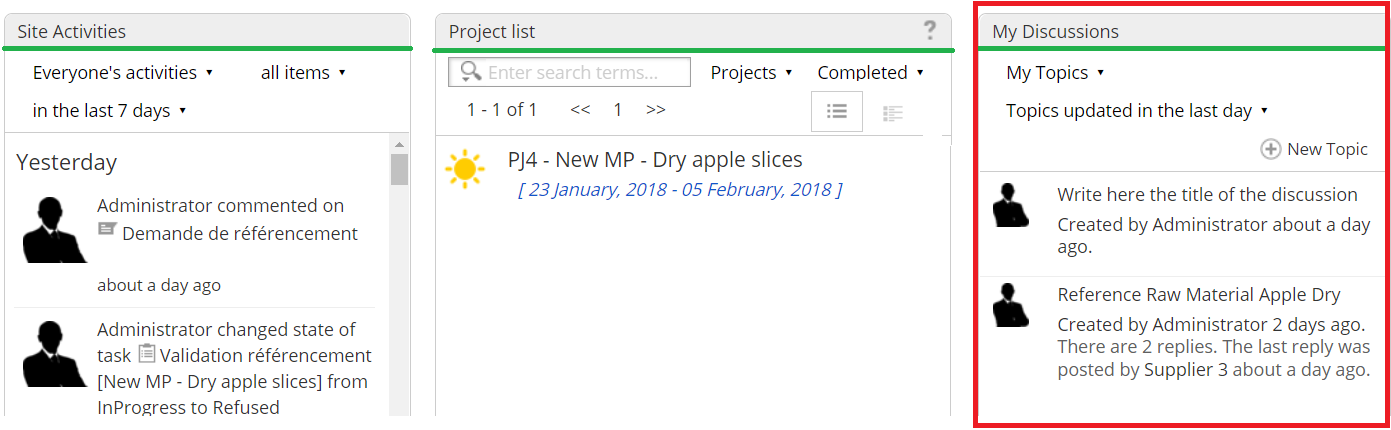
In the dashboard’s user :
If you have configured your welcome page (dashboard), you will see by logging in to your profile, all the active discussions from the sites of which you are an active member.
You can intervene in the discussion without logging to the different site by using this interface.
2. Supplier Tutorial
2.1 User interface
The login page and the login information (username and password) will be sent to you by your client.
Once you are logged in, a new window opens. It is your dashboard.
The dashboard will tell you at a glance if you have any task waiting or if there is an active discussion.
You can’t create a task or a discussion. The client is the only one who can do it.
2.2 The Tasks
To select a task, just press it. A window will open
To access to :
- Supplier assistant : cliquer sur l’icône 1,
- Raw material assistant : cliquer sur l'icône 2.
How to change a task
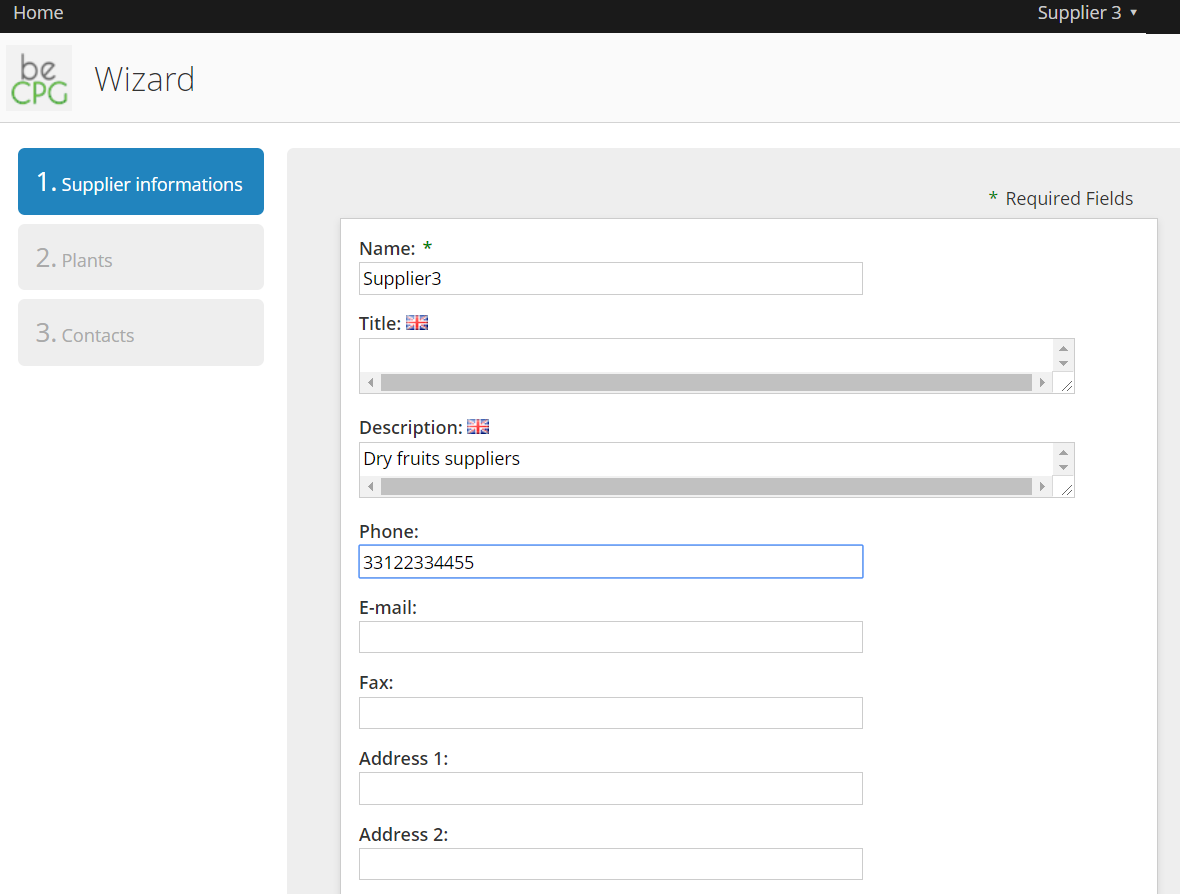
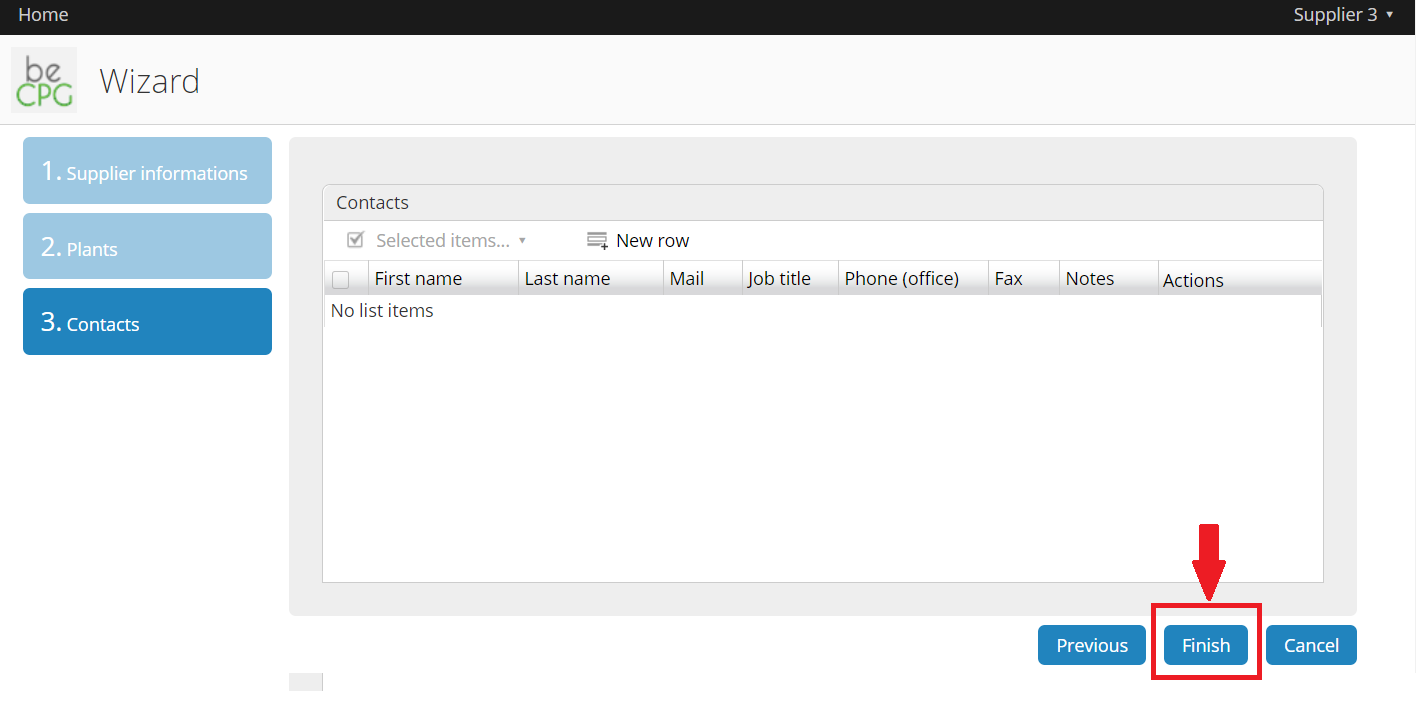
Supplier's Assistant
You can fill or change the requested information
For each step, click on “next” and to stop or to finish, click on “Finish”.
You can change the data at any time.
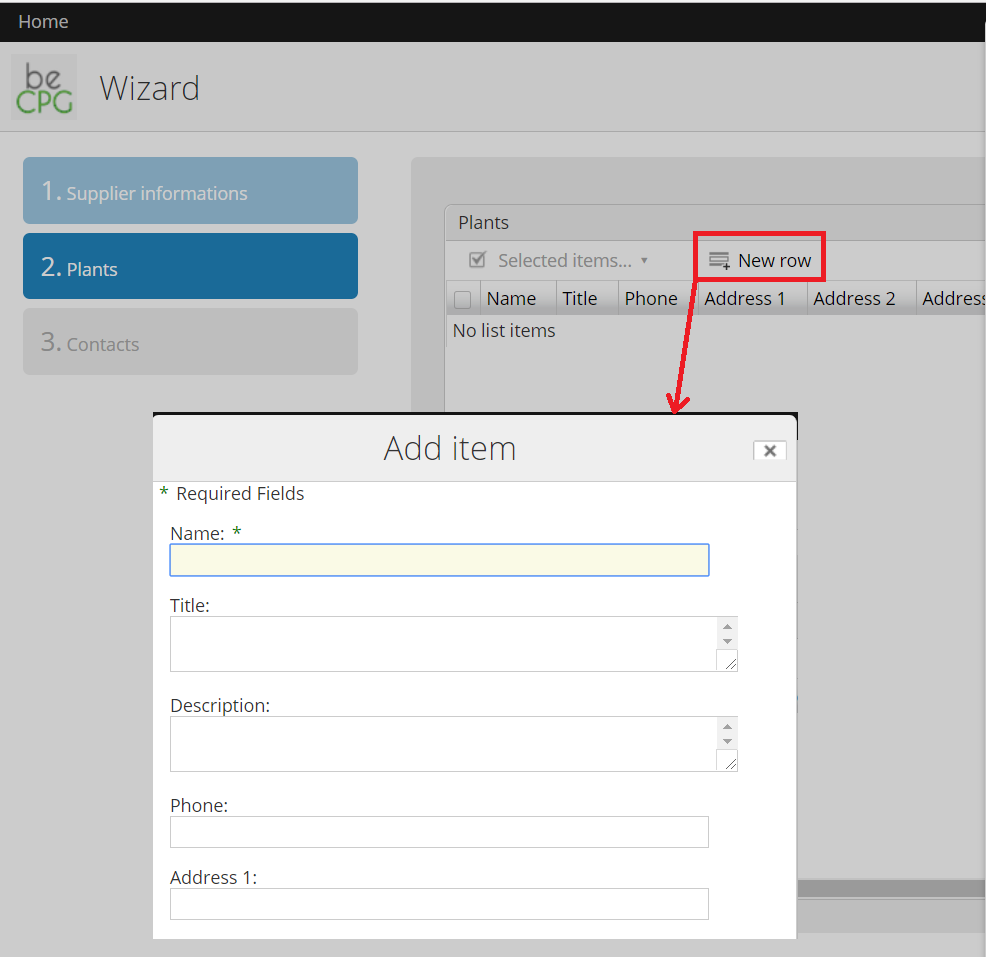

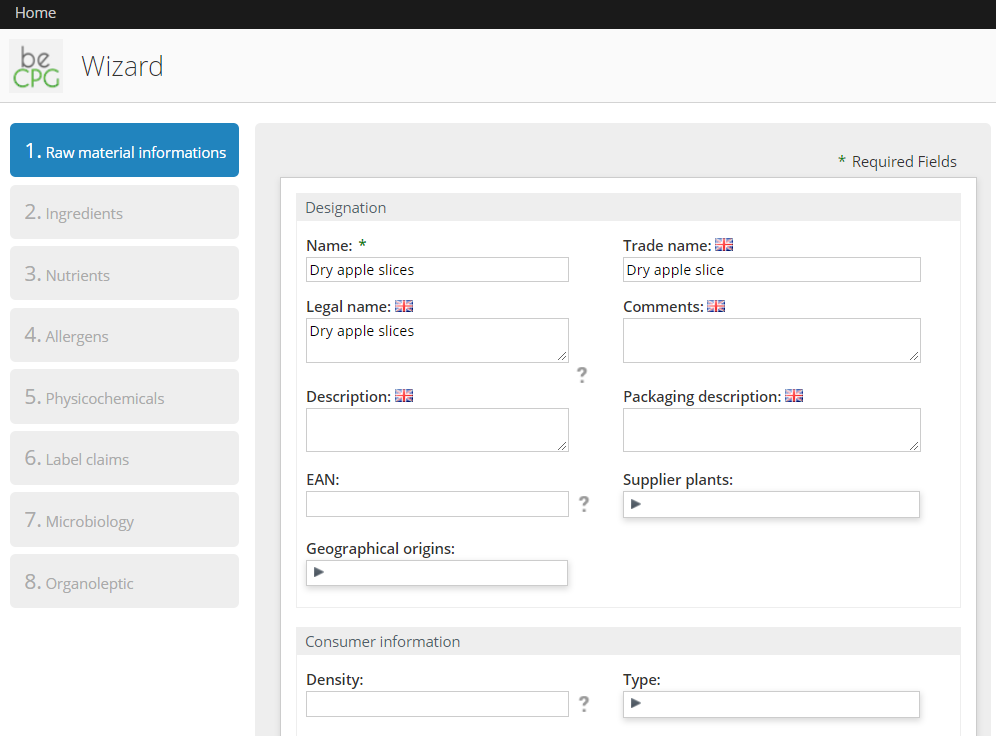
Assistant création de la matière première
You can fill the information for the specific raw material.
You can fill the field to be completed.
Each step must be validated by clicking on “Next”. Validate each step before pressing “Finish”.
It is possible to stop and to resume the data entry whenever you wish.
Finish the Task
Before ended the task, you can write a comment for your client (missing ingredient, physico-chemical results…).
Once all the tasks have been completed, the tasks’ list will be empty.
End the task "Supplier's information":
If you click on "CANCEL" your progress will be saved. Only the information on the last window will be lost.
To complete the task "Création de la matière première" :

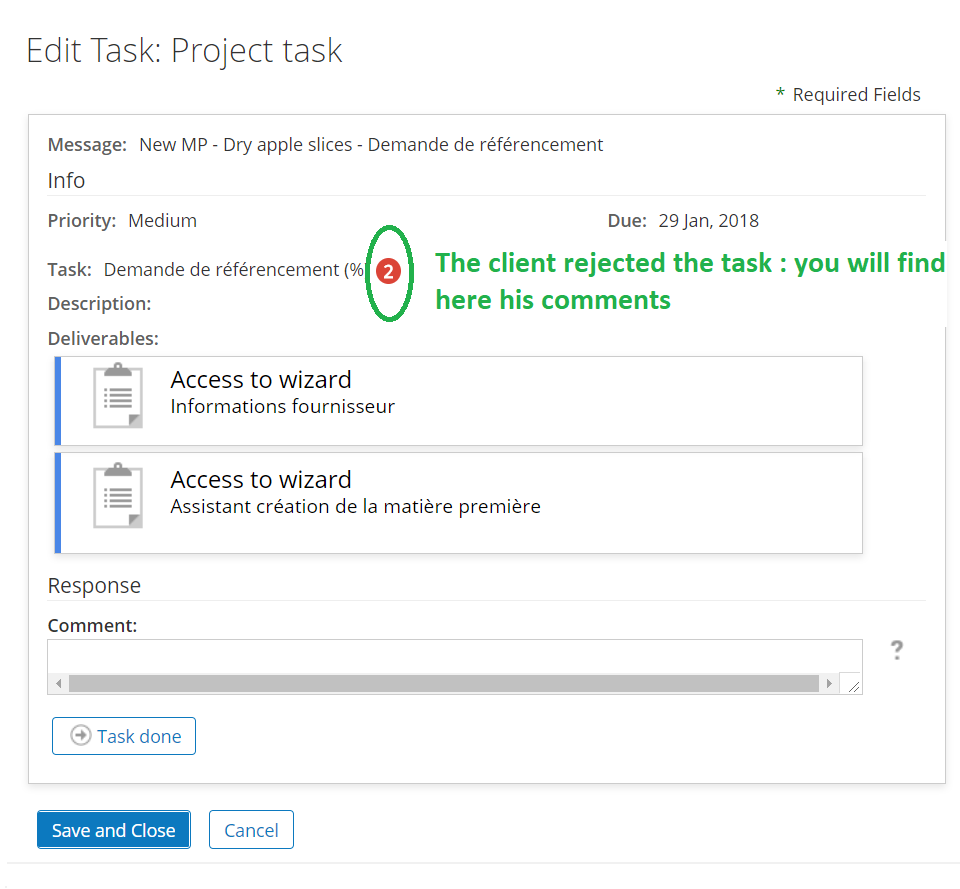
Task sent back from a client
The client may have comments about the information which you have registered. The task is going to appears again on the supplier‘s dashboard.
The client will have validated some information. There are now locked and no more editable.
An icon (see below) indicates a comment writing by the client. It is possible to read it and to answer.

2.5 Discussion
To facilitate the exchange of information, the client can create a discussion. A discussion allows the site’s members to discuss all subjects at the same time and in the same space.
Only the subjects related to your products will be visible on your dashboard.
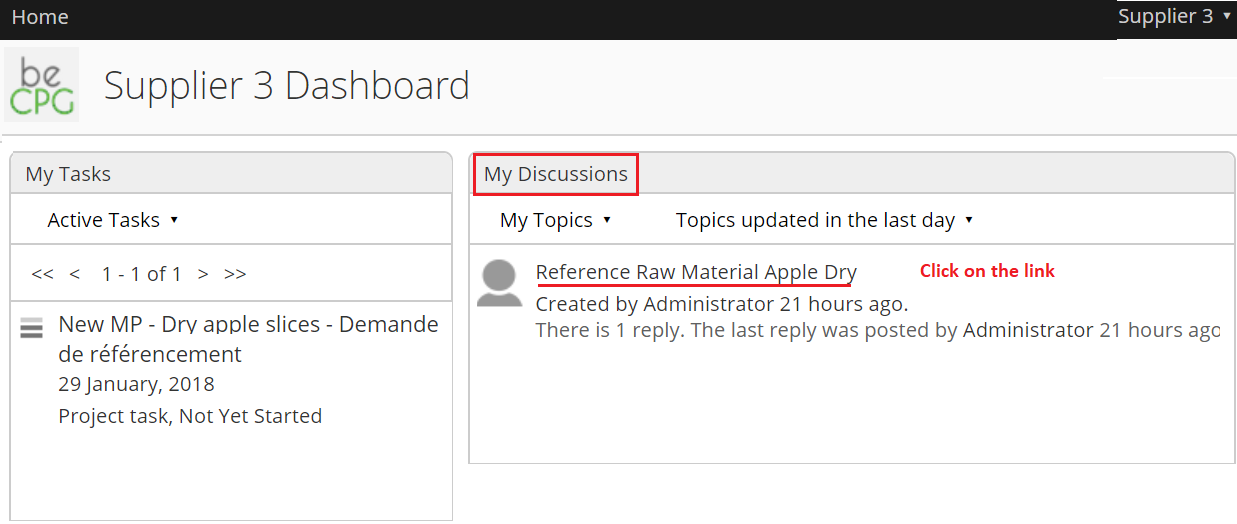
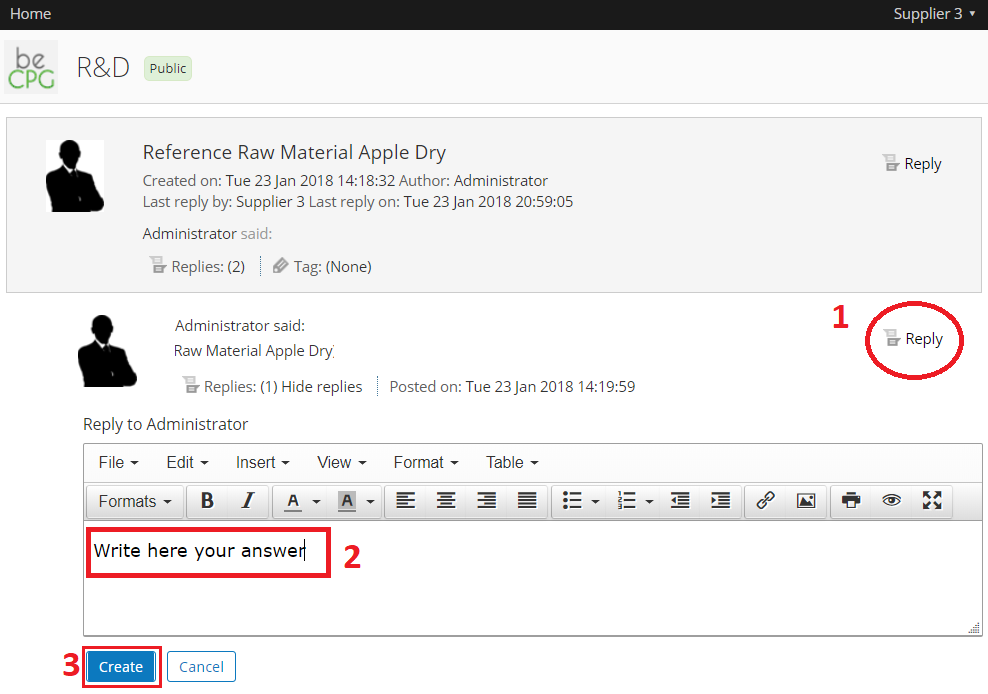
To answer and to consult a discussion, you only need to click on the subject and click on “Answer”
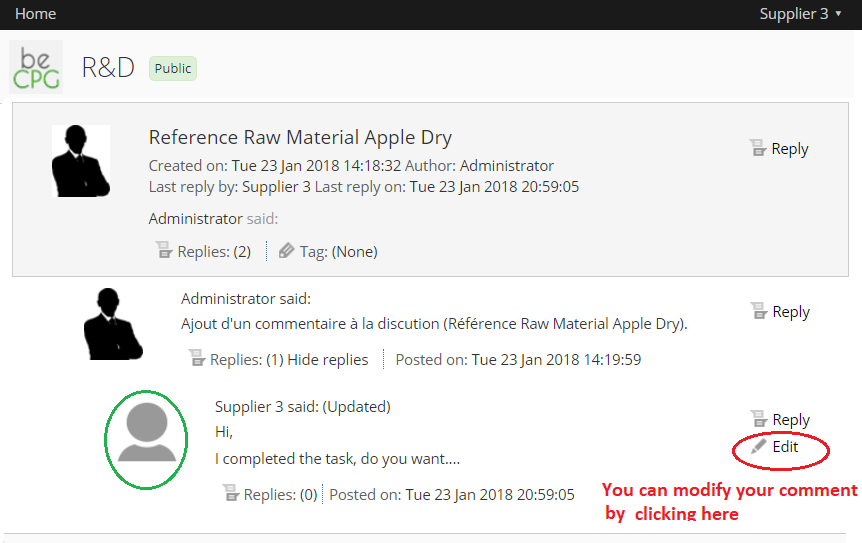
It will be possible to change your answer by clicking on “modifier”.
How to answer :
Click on the discussion you are interested in :